How to install Ubuntu20.04 LTS on Mini PC?
Step 1, If can't booting from Ubuntu bootable disk, please change BIOS Setting to allow booting from Ubuntu bootable disk.(Gemini Lake J4125 & J4105 & N4020 & N4000,no need to set BIOS for other platforms)
A. Press the power button and press F7 or Delete continuously to enter select boot device menu -> select Enter Setup and press Enter to enter into BIOS Setting menu.
B.BIOS Setting ->Chipset ->Common Function ->OS Selection ->Select Intel Linux.
C.BIOS Setting ->Chipset ->South Cluster Configuration ->Miscellaneous Configuration ->8254 Clock Gating ->Select Disable to disable 8254 Clock Gating.
D. Press F4 to save and exit.
Step 2,Create a Ubuntu 20.04 LTS bootable USB flash disk.
Use a third-party tool to create a Ubuntu 20.04 LTS bootable USB flash disk, like UltraISO.
A.Run UltraISO on your PC.
B. Click File->Open to open the Ubuntu 20.04 LTS image.

C. Click Bootable-> Write Disk Image->Write to create a Ubuntu 20.04 LTS bootable USB flash disk.


Then connect the MiniPC to TV with HDMI cable.

C. Select “Ubuntu” or “OEM install(for manufacturers)” to install Ubuntu.

Select Install Ubuntu.

Choose keyboard layout.

Select updates and software.
If you want to save installation time, do not tick Download updates.

Select installation type.

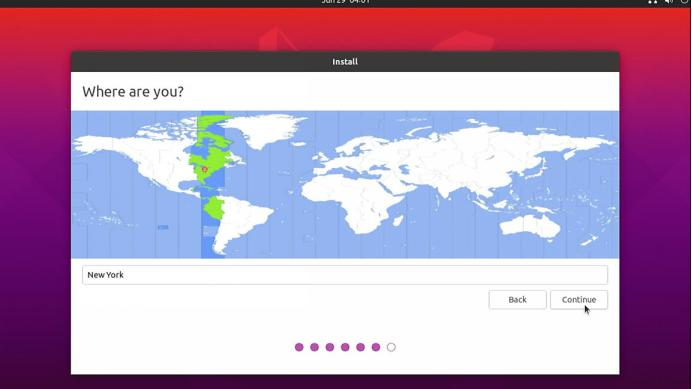
Select your location.
Set up your name and password. And then click Continue.

Installing system.

After system Installation Complete, click Restart Now.

Remove the installation medium,then press Enter.


Double click "Prepare for shipping to end user", input your password and click Authenticate to restore all the settings.

When finished, select shutdown.
Written by MeLEStore

Leave a comment
This site is protected by hCaptcha and the hCaptcha Privacy Policy and Terms of Service apply.